Cloud integration
Flashing the NodeMCU
Before running our cloud server, we definitely want to actually upload the Coink MicroPython code to the NodeMCU board.
This is actually very simple, but we do need to have some dependencies
installed: screen and ampy. Once we have those, we can simply connect
our board to our computer with an USB cable and:
./flash.sh
This Bash script will upload all the necessary code to our board.
Coink server
Running the Coink server is necessary to appropriately process the data and classify the coins in “the cloud”, whether it is your own computer or an actual cloud service.
The server is implemented with Flask [1] and requires some other Python packages to run. Fortunately, Pipenv [2] helps us to create the required virtual environment with all dependencies installed:
pipenv sync
If we want to have all the development dependencies installed, use instead:
pipenv sync --dev
Our prototype is designed to work within a local area network, where we have
the NodeMCU and our computer connected to the same WiFi network (probably our
home network). In order to be able to do so, we need to copy the contents of
the config.template.json to a new config.json file, that would look
like this:
{
    "thingspeak_key": "0123456789ABCDEF",
    "wifi": {
        "ssid": "MyWifi",
        "password": "secure123"
    },
    "server": {
        "host": "0.0.0.0",
        "port": "5000"
    }
}
We need to modify the "wifi" fields with our network name and password.
Note that there is another section to configure the "server". There, we
need to put our computer IP address and a port, where our server will be
listening on.
Note
The access port should be just a free port, try it for example with 5000
Then we can run the server with Pipenv:
pipenv run python server.py
If everything went well, you should be able to access the configured server
with your web browser. To do so, visit
http://your-defined-host:your-defined-port/ (i.e.:
http://192.168.43.110:5000/), you should see the Coink server page:
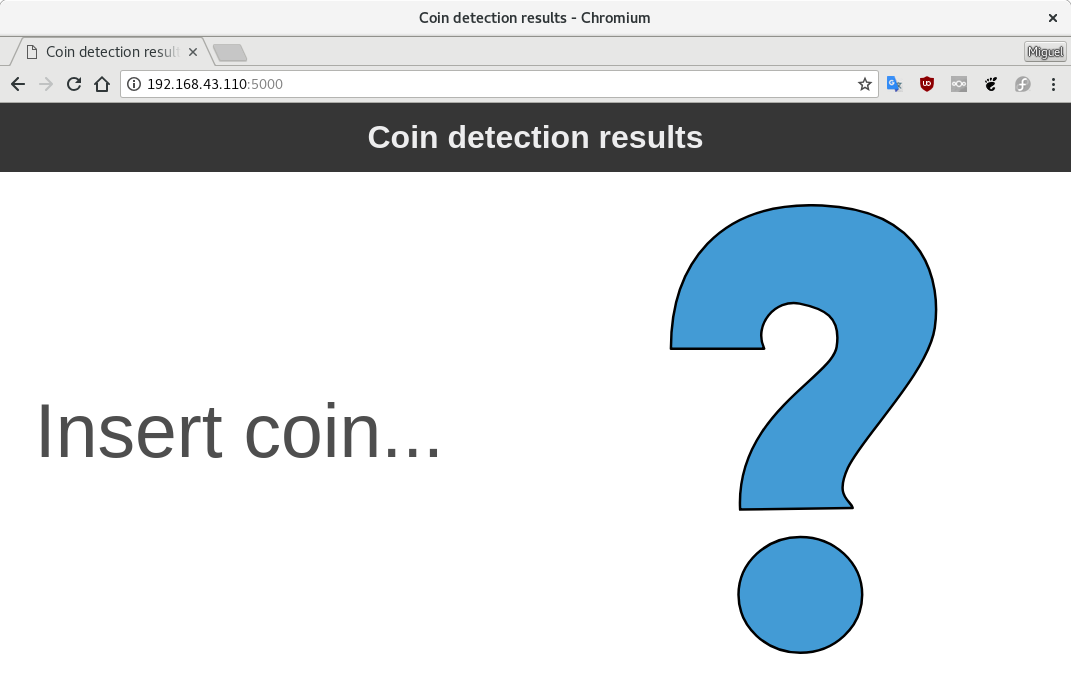
Coink landing page.
Now go ahead and insert one coin into your Coink! ^^
Thingspeak
Integrating Coink with an external cloud service like Thingspeak is very straight forward thanks to their public RESTful API. We just need to write a couple of lines of code to process and visualize the data appropriately.
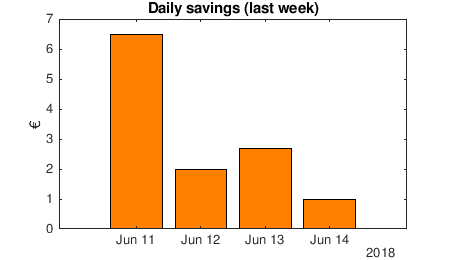
The following code snippet plots the daily savings in the last couple of days:
[data, time] = thingSpeakRead(516536, 'Fields', [1], 'NumDays', 7);
data = timetable(time, data)
data = retime(data, 'daily', 'sum')
bar(data.time, data.Variables, 'FaceColor', [1 .5 0])
The following code snippet plots the total accumulated savings:
[data, time] = thingSpeakRead(516536, 'Fields', [1], 'NumDays', 365);
curve = cumsum(data);
area(time, curve, 'FaceColor', [1 .5 0]);
title(strcat('Total savings: ', num2str(sum(data), '%.2f'), ' €'));
ylabel('€');
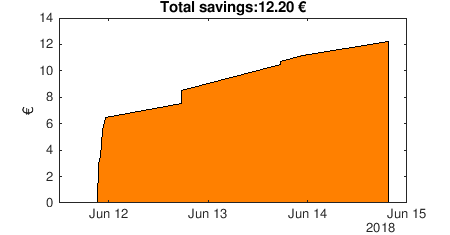
Note that the code above assumes that the Thingspeak channel was created to ingest a single field, which corresponds to the coin that was detected on insertion. The code then sums by day or calculates the total cumulated sum.